



GOOD THINGS
...come to those who sign
up for our emails.
Get 10% Off Instantly Plus
Special sales. New product offerings. Inspiring ideas.
(Basically – FYI's on everything important and trending.)

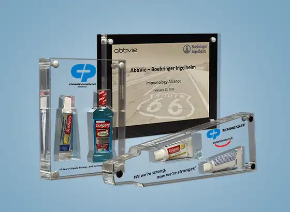
The acrylic embedding process begins by creating a liquid form of Lucite® resin. We mix a crystal-clear liquid monomer with a powdered polymer that looks much like white baking flour.
Mixing ratios can vary from 70/30 to 30/70 depending on the item being cast. Experience plays an important role in selecting the correct ratio and creating the bubble-free clarity needed to showcase the embedded item at its best.
Once mixed, the monomer and polymer take on the appearance of cake batter and can be poured into the mold. Made from metal or cardboard, the molds are typically about 25% larger than the finished product to allow for cutting, grinding, sanding, and final polishing.
The molds are filled partially and the compound is allowed to sit for several hours while it becomes firm. Once the first layer is ready, the item being embedded is carefully placed into the mold and positioned. Additional layers are then added throughout the day until the desired thickness is achieved.
Watch our embedding team work through the casting process and see how a custom item moves from the early production stages toward a finished Lucite® embedment.

After the embedment comes out of the autoclave, the shrinkage from the curing process makes it possible to remove the cast piece from its mold.
That is when the finishing work begins. The rough casting is planed, sawed, sanded, and diamond-honed before the surfaces are polished to achieve the clarity and finish expected from a completed acrylic embedment.
Once the piece has been finished, additional customization such as laser engraving or full-color printing can be added when the project requires it.


GOOD THINGS
...come to those who sign
up for our emails.
Get 10% Off Instantly Plus
Special sales. New product offerings. Inspiring ideas.
(Basically – FYI's on everything important and trending.)