


Acrylic or PolyMethyl MethAcrylate (PMMA) if you want to get technical is an inherently transparent plastic. Though many forms of acrylic are tinted to add color, the monomer and polymer used to create Lucite® a brand of acrylic are clear by nature when cast, exposed to heat and pressure, machined, then finely polished.
Some unique characteristics of Acrylic
- Highly machinable
- Exceptional clarity
- Resistant to temperature variations
- Vastly more impact resistant than glass
- Half the weight of glass
- Excellent chemical resistance
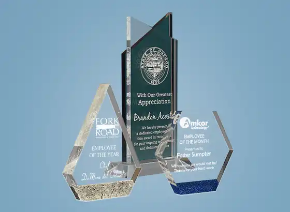
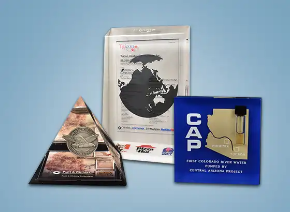
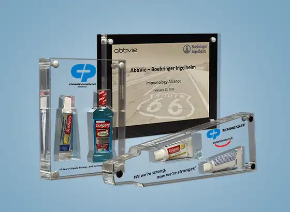
If you’ve spent any time on our site, you have probably figured out that Acrylic is our thing. On top of being beautiful, acrylic’s machinability makes it the perfect medium for fine corporate acrylic awards.
From custom embedded acrylic deal toys to uniquely shaped laser cut awards polished to perfection – acrylic offers characteristics like no other material on the market.

Acrylic vs. Glass
As a comparison, let’s take a look at two popular mediums used in the awards industry today. Both acrylic and glass are beautiful, present well, and are often appreciated by the recipient.
However glass has some very negative characteristics that are worth thinking about prior to making a purchase.
- Glass is heavy – almost twice the weight and can increase shipping costs significantly
- Glass is breakable and cannot be repaired
- Chips and scratches in glass cannot be polished out
We’re going to let you in on a little secret...
 The key to polishing acrylic is patience.
Polishing acrylic is a painstaking process which may include multiple steps to create the crystal clear appearance Lucite® is known for. Often included in the machining process – planing, saw cutting, laser cutting, edging, sanding, and polishing. The final results are truly defined by the diligent efforts put forth.
We're going to run though each of the steps mentioned above to help you understand the process of polishing acrylic. Each step in the manufacturing process as important as the other to achieve results.
Now let's take a look at the most common steps to achieve perfectly polished acrylic.

Planing Acrylic
The process used to achieve uniform thickness in cast acrylic is called planing. The process for surface planing acrylic is similar to wood. By feeding the cast blocks of acrylic through a planer the surface layers can be removed incrementally in order to level and remove any imperfections present on the surface of the blocks.

Sawcutting Acrylic
Often done with a table saw, acrylic can be sawcut or LaserCut™ to specific dimensions. Much in the way wood is cut on a table saw, acrylic can be cut using a triple chip blade with a zero hook inclination angle.
This is a perfect opportunity to address chip load whereby the number of saw blade teeth can affect the final outcome. See below our ice cream analogy to understand chip load – then imagine a 4” thick piece of acrylic needing to be cut.
Choosing a blade that will remove larger incremental chips (less teeth = small bites) will allow the blade to flow through the material without binding due to heat. Whereas a blade with a lot of teeth would have the effect of slicing with small chips binding the blade path (more teeth = larger scoop).
Here are some basic blade choices we use to cut acrylic:
- ⅛” to 1 ½” = 100 Tooth Blade
- 2” to 3 ½” = 60 Tooth Blade
- 4” + = 40 Tooth Blade
 Understanding Chip Load
Chip load is an important factor in machining acrylic and is relevant to the size of the chip that is removed with each flute per revolution of the blade. It is important to ensure that the heat generated from the blade friction does not interfere with the cutting process.
Imagine a tub of very cold ice cream. If you remove small scoops (a small spoon), the process of removing incremental amounts is achievable – however if you dig deep, you’re more likely to struggle or bend your spoon.
Chip load is relevant to every piece of equipment used in acrylic machining as it is prepared for final polishing.
Hopefully we didn’t lose you and you’re not off to getting a bowl of butter crunch – my all time favorite by the way.

Laser Cutting Acrylic
High powered lasers make the perfect fabrication tool in any production facility. Lasers are capable of gracefully slicing through acrylic sheet stock, leaving the equivalent of a flame polished edge.
Almost any vectored shape can be cut out of acrylic and used to produce custom shaped trophies and medals. When lasers are used to cut trophy components, it’s imperative to edge the bottom of the trophies to ensure they are perfectly square and polished – especially if gluing to an acrylic base.

Edging Acrylic
Edging acrylic is very similar to surface planing with the exception of focused removal of the edge material to square, smooth, and prepare for final edge polishing. The image above shows one of our acrylic edging machines cleaning up the sides of cast acrylic trophies prior to sending to the polishing room.
With a diamond blade that removes exacting amounts of the acrylic material – the process of fine polishing the edges is made simpler and the final outcome is second to none.

Sanding Acrylic
As a rule of thumb, we do our best not to have to sand acrylic except if required to remove a flaw or to smooth out irregularities. Most acrylic sheet stock is protected with a paper protective layer with polished surfaces, so sanding and repolishing is not necessary.
A 320 grit paper is used to smooth our custom cast acrylic embedded items with surface areas over 4” in order to prepare for the final stage – polishing. Surface areas less than 4” can be edged as described above.


Polishing Acrylic
Every step to this point has prepared the acrylic surface for the final three steps – rough polish, fine luster polish and hand polish. Though both wheels use the same 1000 RPM (revolutions per minute) and 18” diameter buffing wheel – the polishing mediums used are uniquely different. We purchase our mediums from North American Composites, a supplier of buffing compounds.
The rough polish has an aggressive polishing agent that takes away larger pieces of the surface layer at a microscopic level. Imagine going from about a 320 grit surface to an 800 grit surface smoothness. After rough polish the beauty of acrylic really begins to show through.
It’s the fine luster polish that makes an acrylic award truly spectacular. Smoothing to the equivalent of approximately 1500 grit – the clarity of acrylic can actually surpass glass in many cases.
Then, the final inspection and hand polishing stage to ensure no flaws need to be addressed. If a flaw, scratch or chip are found – acrylic can be sent back through the process as needed.
Watch this video that shows our team polishing a cast acrylic embedment with a retired police badge floating gracefully inside. The progression of rough to fine polish finish is worth checking out.
![]()
Though every step in the manufacturing process of fine acrylic awards is imperative to the final outcome, it’s finishing that takes it to the next level. US Acrylic Awards wants to be your award supplier and will apply our 300 plus years of combined acrylic manufacturing experience to every project we take on.
Written by noptim… unleash the power


