

Adding low cost colored accents, logos, and images to acrylic sheet stock and awards is now a reality with the introduction of full color UV Printing on Acrylic. What UV Printing is, how it is done, and how it can be utilized to create exceptional acrylic awards are all questions we’re going to address in this article.
Before we take a look at what UV Printing is, let’s review the old way of printing on acrylic sheet stock and award blanks.
Prior to direct UV printing technology the most common way of decorating acrylics with color was screen printing. Silk screen printing is a time consuming process that involves multiple steps to achieve quality results including design, film, screen preparation, screen exposure, set-up, and finally printing.
Though direct UV printing has become the norm, in some instances the old fashioned way of screen printing acrylic is still more cost effective than direct printing. Let’s take a quick look at a simplified description of silk screen printing so the basics are understood before moving on.
 Design
Though the screen printing design process is much the same as UV Printing, there are some unique requirements that differ in order to separate colors for a multi-colored imprint.
In order to print in multiple colors, each color needs to be separated and prepared for an individual screen that will allow the ink to be pushed through the screen onto the substrate (in this case acrylic). Each separation then needs to be converted to a film positive that will be used to expose the screen.
 Film Positives
Film positives are required to allow direct light to travel through the clear sections of the film in order to harden a photosensitive emulsion added to the screen. Photosensitive emulsion is a thin coating of liquid material or film applied evenly to the back of a silk screen that hardens when exposed to direct light.
In order to create openings in the screen, the film positive will have areas blacked out (the design to be printed) that will prohibit the direct light from curing the photosensitive emulsion, leaving those sections soft and capable of being washed out easily with water.
It’s these areas of washed out screen that allow ink to be pushed through the fabric, leaving a very thin coat of color (or ink) on the substrate.
 Screen Preparation
Screen preparation may be the most important step in the process. Since silk screens are reusable – cleaning and degreasing the mesh is critical to making sure the photosensitive emulsion adheres to the surface of the screen properly.
Cleaning an existing screen requires the removal of the existing stencil or emulsion and any residue ink that may be adhered to the mesh with an industrial chemical or a product made of soybeans like One Step Clear by Franmar Chemical.
 Apply Photosensitive Emulsion
The next step after the silk screen has been cleaned and dried is to apply a liquid photosensitive emulsion or capillary film.
Photosensitive emulsions are applied to the back of the screen with a device called a scoop coater that holds the emulsion in an open container, allowing for a simple stroke on the back side of the screen that applies a thin coat of emulsion which when dry will be sensitive to light.
Capillary film is applied by cutting the required size, laying its emulsion side up, placing the back side of the silkscreen on top of the file, and misting water on the inside of the screen which causes the film to soften and begin to adhere to the mesh. A simple stroke of a squeegee sets the film on the backside of the screen.
In most cases it is best to use capillary film when screen printing on acrylic because capillary film is manufactured with a very uniform thickness which allows for the proper ink distribution on the acrylic when printed.
 Exposure
Once the screens are prepared with photosensitive emulsion, exposing the screen is achieved by layering the film positive between a light source and the back side of the coated screen mesh. This allows the light to harden the areas that the light penetrates and leaves the blacked out sections soft and susceptible to washing out with water.
In the case of a multi-colored imprint, it’s very important that the positioning of the film positive in relation to the coated screen is the same for each exposed screen. This helps make setting up the press quick and easy. Aligning the film positives to the screen is often achieved by adding targets to each of the film positive color separations and making sure each film positive is uniform for each screen prior to exposure to light.
Applying the proper amount of light for the correct duration of time can be highly technical, based on the emulsion type and or thickness of the capillary film – so we won’t dive in any further.
 Press Set-Up
As we discussed earlier in the design process, each color must have its own separation, film positive, and screen in order to add multiple colors to acrylic substrates. Plus, in many cases printing on acrylic requires an opaque layer of white printed either behind the colors if the printing is on the front of the acrylic or on the top if the printing is layered on the back side of the clear Lucite® material.
Imagine a clear block of acrylic that needs to be printed on the back side with three colors – yellow, red, and black. In order to make that happen, each color must be set up independently on the press with its own screen starting with black, then yellow, then red, and in most cases a final white back imprint to make sure the printed colors are completely opaque.
Each of those colors requires precise jigging and alignment of the press in order to ensure the final result is exactly as design was intended. The use of alignment jigs and micro adjustments on the press, plus the targets added to the film positive all contribute to proper screen alignment.
 Printing
Today, most of the printing that is done on acrylics uses ultraviolet inks. Ultraviolet inks only cure when exposed to UV light. In the past, printing on acrylic was done with air dry inks that required drying racks to stack the printed pieces until the next color could be applied. The inks used today only require a drying tunnel that directs ultraviolet light on the surface of the freshly printed ink.
Once the screens are exposed, aligned, and the substrate is ready for printing – it's time to load the screen up with a small amount of ink. The screen print operator adds a small amount of the proper color ink to the inside of the screen and gently pulls the ink across the stencil to flood or push ink into the screen. Then the screen is lowered to just a few millimeters above the acrylic block so the operator can add enough pressure to the screen with the squeegee surface and pull it across the stencil which transfers the ink onto the acrylic material leaving the desired design on the substrate.
The acrylic block is then sent through the ultraviolet light tunnel to cure the initial color. Each additional color is applied in the same manner as above until all have been applied, including the opaque white background.
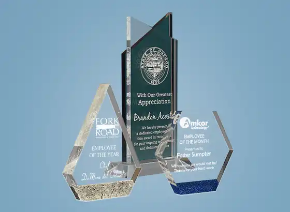
When complete, the final effect is a layered imprint on the backside of the clear acrylic substrate that when viewed from the front displays all of the colors applied.
The process of direct Ultraviolet (UV) Printing
Though direct ultraviolet printing has been around since the 1970’s, it has only been utilized in the awards industry for around 20 years. Many acrylic award manufacturers migrated to flat bed ultraviolet printers in the mid to early 2000’s to improve quality and increase production capabilities.
Leading the pack in flatbed ultraviolet printing technology, Mimaki was one of the first to market to the awards industry. Since 2004, Mimaki has introduced multiple design and production improvements that have improved the speed, functionality, and production quality of their ultraviolet flatbed printers.
 How does a UV printer work?
Many of you are familiar with inkjet printers – the process of utilizing a computer peripheral that can reproduce hard copies of text and full color graphics by spraying droplets of ink onto paper substrates. Many inkjet printers today have ink cartridges that represent the CMYK color profile with a cartridge for each cyan, magenta, yellow, and black.
A flatbed ultraviolet printer is similar to an inkjet, with the exception of the process the printer uses to spray the droplets of ink onto the substrate. First, instead of using rollers to move the paper incrementally, the flatbed operates by moving a large commercial print head across an X,Y axis. As the print head moves, it sprays the ultraviolet ink onto the substrate that is often held down using a vacuum table to keep it in place.
Mimaki offers multiple print head and ink cartridge configurations, with the two most common configurations being CMYK with dual white or CMYK with dual white, light cyan, and light magenta. Notice that both have dual white which is an important feature that adds the opacity needed to make sure the colors pop on clear substrates.
Much like silk screening, the computer design process is similar – except for the fact that each color does not need to be separated individually in order to apply the ink layers as discussed earlier. Once the full color design is created and sent to the customer for approval it can be sent to the flatbed printer to apply the design on acrylic as required.
First, the acrylic sheet stock or individual award items must be placed on the bed of the printer with the substrate to be printed clean. The height of the print head must be set to the proper distance from the substrate to ensure the detail of the image is accurate. The design is sent from the graphic designer's computer to the flatbed printer which processes the file through an RIP (raster imaging processor) that communicates with the printer telling it to move from side to side as well as up and down the printer bed while spraying tiny droplets of ink onto the surface of the acrylic. The large print head has an ultraviolet light built into the carriage that cures the ink directly on the surface as the print head sprays the ink.
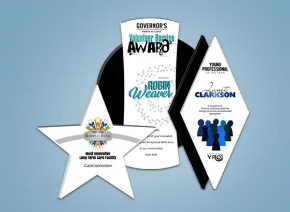
Check out this video that shows a Mimaki flatbed in action printing some LaserCut™ Acrylic Awards in the production stages. By combining Laser cutters and ultraviolet flatbed printing technology – the Future of Recognition is changing daily.
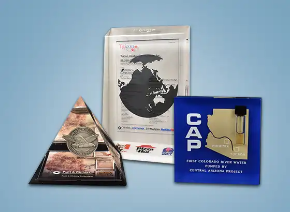
Notice how the ultraviolet printer first prints the color, then after the color is cured with an ultraviolet light that is located inside the carriage alongside the printhead, it follows up to print over the top with an opaque white ensuring the color pops on the award. In some cases white is not applied in order to allow light to migrate through the applied ink which then creates a very unique translucent look on clear Lucite® and acrylic. One of our most popular stock award designs is our exclusive Lucent™ Acrylic Award series which displays an excellent example of how we forgo the white thus enhancing the color characteristics of the trophy.
UV printing on acrylic is here to stay
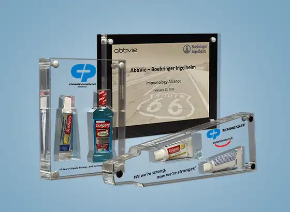
In closing, ultraviolet printing on acrylic is generally faster, more accurate, and offers significantly more color options than silk screening on acrylic. Though it’s unlikely high quality acrylic award manufacturers will ever abandon silk screening altogether, we expect the most unique acrylic awards, deal toys, and financial tombstones of the future will likely use ultraviolet printing as a decorating cornerstone in their manufacturing processes.
US Acrylic Awards offers the best of both worlds. Featuring a full manufacturing facility located in beautiful Glendale, Arizona, all of our products are hand Made in the USA by skilled craftsmen who know the characteristics of Lucite® materials and how to decorate them in full color.
Written by noptim… unleash the power


